


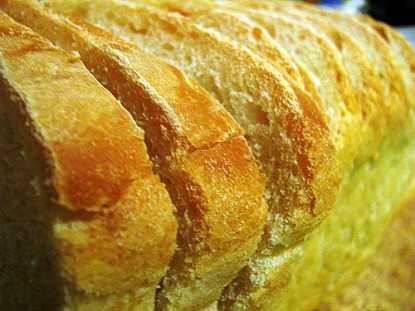
Deliciously simple and simply delicious, Grandmother Bread is a daily staple in our farmhouse. This is a heritage recipe, tested by time and the hands of mothers and grandmothers for over a hundred years. This secret family recipe is different from many standard white bread recipes in that it contains no milk, egg, or oil, and its very simplicity produces a bread of light but sturdy texture that yields loaves for perfectly sliced sandwich bread (the best sandwich bread you’ll ever taste! also makes excellent french toast!), plus the same dough can be used to create dinner rolls, cinnamon-swirl loaves, sweet rolls, crispies, and apple-streudel ladder loaf. Once you’ve grasped the concept of the standard Grandmother Bread recipe, you can create variations of your own–the possibilities are limitless!
Difficulty: Easy
Servings: 1 or 2 loaves
Cook Time: 25 minIngredients
Two-loaf standard recipe
3 cups warm water
1 tablespoon yeast (1 packet)
1 teaspoon salt
1/4 cup sugar
7 cups all-purpose flour
One-loaf standard recipe
1 1/2 cups warm water
1 teaspoon yeast
1/2 teaspoon salt
2 tablespoons sugar
3 1/2 cups flour
Directions
See step by step instructions on How to Make Bread
In a large bowl, combine water, yeast, sugar, and salt. Let sit five minutes.
Stir in first three cups of flour with a heavy spoon. Add the next cup of flour a little at a time as needed, stirring until dough becomes too stiff to continue stirring easily. Add a little more flour and begin kneading. The amount of flour is approximate–your mileage may vary! Continue adding flour and kneading until the dough is smooth and elastic.
Let dough rise in a greased, covered bowl until doubled. (Usually, about an hour.) Uncover bowl; sprinkle in a little more flour and knead again before dividing in half. With floured hands, shape dough into loaves and place in two greased loaf pans. Tear off two pieces of waxed paper and grease with oil spray (to prevent it from sticking to the loaves as they rise) and cover loaf pans. Let rise till loaves are tall and beautiful! (About an hour, depending on the temperature in your kitchen.)
Bake for 25 minutes in a preheated 350-degree oven.
***See the Grandmother Bread Cookbook page for more recipes, ideas, and tips about using this versatile dough.
Categories: Breads, Old-Fashioned, Rolls, Yeast Breads
Submitted by: suzanne-mcminn on June 6, 2010


Shmemily says:
My husband made this the other night (he’s the baker, I’m the cook). He made the dough in the bread machine and then baked in the oven. It was absolutely delicious and I can’t wait until he tries the sourdough version. This was so good and thank you for sharing!
On June 13, 2010 at 6:31 pm
Imperious Fig says:
My daughter made Grandmother Bread yesterday to enter in the Tyler County Fair. Her loaf looked great!
On August 2, 2010 at 1:54 pm
Smee says:
I have made about 6 loaves of this over the past week, and I think the hubster and the girl are wanting nothing else. I even had to make a loaf for a friend, who is pregnant and not up to making her own. Thank you for posting the recipe!
On August 9, 2010 at 11:49 am
Maribeth says:
I have made this recipe for bread now at least 6 times in the past 2 months. We love it! I have made the Pepperoni Rolls, Cinnamon Bread, Cinnamon Rolls also and they are excellent! I just retired and one of the things I wanted to do was learn how to bake homemade bread. I have not had very good luck in the past with other recipes so had not tried making it for many years. This was so good that I have been keeping several loaves in the freezer. Thanks so much for the recipe! I love the website and visit daily. It was a pleasant surprise to find you don’t live that far away from me! I live in the Charleston area.
On September 9, 2010 at 9:00 am
Ross says:
This is the bread I make when I am in a hurry. It is quite posible to come in from work by 6 pm and mix the dough, knead it, let it rise, shape it and bake it before 10 pm. When I was in the Air Force with a new wife fifty years ago I made this style recipe into rolls about the size of potatoes and we had them for breakfast.
On December 27, 2010 at 3:10 pm
justdeborah2002 says:
This is possibly the perfect bread. Dense enough, light enough. The loaf is still soft the next morning.
Thank you for sharing this with us.
On January 2, 2011 at 8:45 am
jfdavidson says:
could you make this recipe into a rye bread reciipe by adding rye seeds or does it take a lot more than that?
On January 15, 2011 at 10:38 am
bldrblue says:
I’ve tried more than once to sign on and say how wonderful this bread recipe is. I have made it four or five times to be sure I wasn’t dreaming. I wasn’t. It’s absolutely perfect. One of lifes great pleasures is to cut the end off this loaf as soon as it’s out of the oven, spread it with butter and just enjoy. Thanks Suzanne.
On January 22, 2011 at 6:25 pm
Nerosmom says:
I finally got this recipe to work. (I think my oven is a bit off….) I had to increase the yeast to 2 teaspoons, the sugar to 3 tablespoons, and the temp to 375. Otherwise I had dense pale bread. Oh, also we live waaaay downsouth where it is horribly humid and I had to increase my flour (single loaf recipe) to 4 1/2 cups….probably why I had to up the yeast!
On March 28, 2011 at 10:35 pm
Suzanne McMinn says:
Nerosmom, I was in Florida a couple years ago and had a TERRIBLE time with every type of bread I tried to make. I think there IS something different about baking down there but I wasn’t there long enough to figure it out.
On March 29, 2011 at 6:07 am
justdeborah2002 says:
I just want to thank you again for this recipe. In 2 and a half hours, I turn out two glorious loaves of bread. Or buns. Or twists. Or pizza crusts.
It is such an amazing feeling of accomplishment to know you can provide bread in such a short time, every single time for your family. There is no “will it work, is it ok???” worry with this recipe.
And that confidence is a beautiful thing!
On March 30, 2011 at 8:03 am
jfdavidson says:
can you add ingredients to this recipe to make it into rye bread?
On July 7, 2011 at 7:15 am
Suzanne McMinn says:
Yes, you can add caraway and rye flour to make a rye bread. I’ll try to post on that soon! You can use different flours in the recipe.
On July 7, 2011 at 7:21 am
jfdavidson says:
thanks. i made your pie crust recipe this weekend and loved it. however, when i went to click on the recipe i missed and hit the rating icons. i rated it like 3.5 which was not my intent. i did not know how to uncheck it. please know that it was a 5*not a 3.5 in my opinion!!! i will wait for the rye recipe!
On July 7, 2011 at 7:26 am
Suzanne McMinn says:
LOL, that’s okay! thank you! I’m glad you liked it! I’ll do the rye recipe soon.
On July 7, 2011 at 7:30 am
abbyjade2012 says:
Help !! I don’t know what I’m doing wrong. I’m using a kitchen aid stand mixer. I can not get the dough to form. I’m doing the one loaf recipe. The dough is loose and very sticky and I had to add bit more flour then what the recipe calls for and it did not double in size during the first rise. The yeast was o.k. I hope I make sense. Thanks
On December 9, 2011 at 8:32 pm
CindyP says:
I’ve never used a KitchenAide @abbyjade2012, but I put your SOS out over on the Forum!!! Hopefully someone can help!
http://chickensintheroad.com/forum/the-farmhouse-table/basic-bread-questions/page-19/#p94200
On December 9, 2011 at 9:08 pm
Ross says:
When making bread you can get into trouble if the liquid is a little too much but you saw that and added a bit more flour. With a stand mixer it is too easy to over mix/over knead. When you make bread and knead it you develop gluten strands that are the basis for the foam or sponge like texture. When you over knead you tear those gluten strands. Do not despair. Let the dough rest for a few hours and gently handle it and coax it into a ball. don’t add any or much flour a little sticky is alright. I am strong enough to knead dough in much the same manner as a kitchen aid mixer and about 100 turns always seems to be enough. Probably much less than a minute. Be patient with it and give it a little more time. Was your flour reasonably new? That is was it bought this year? I have had some real disasters with 3 to 4 year old flour.
On December 9, 2011 at 9:54 pm
murphala says:
Hi! Not too long ago I came upon this post on CITR: http://chickensintheroad.com/cooking/making-bread-with-a-dough-hook/
And I found it and many of the comments very helpful. Personally I tend to lose count on how much flour I end up using and go by feel. I sometimes go the whole mile w/the KA, others, half the way and get my hands dirty with a traditional knead. Most important is getting to know the “feel” of the dough rather than counting cups of flour, which comes with practice! I also make sure to incorporate liquids and flour slowly, using the low stir setting. I also let it rest periodically through the process, as just five or ten minutes can make huge difference in the dough’s texture. Good luck! 🙂
On December 10, 2011 at 12:07 pm
willowtreebunnies says:
so easy to make
On March 14, 2012 at 10:16 pm
Laura davis says:
Suzanne,
My bread machine took a dive and it has been the best thing that ever happened to me! I put that baby in the trash and haven’t looked back. After reading how you make this almost every day by hand, I thought I would give that a try myself. Meet a convert. The hands on time for making bread really is so minimal that a machine to make bread now makes about as much sence as purchasing a microwave to heat hot chocolate. Love this versatile, tasty recipe!
Thanks for sharing!
On March 22, 2012 at 11:34 pm
Sarah says:
I have made this bread a zillion times since I have discovered your site and this recipe. Recently I made a bunch of dough ahead of time and froze them in individual balls. When thawing they do not rise – they just thaw to flat sheets of dough. What might I be doing wrong? When I bake this bread from fresh dough I have never had an issue. I use the same yeast every time (room temperature).
On March 23, 2012 at 4:41 pm
PaulaA says:
I am hoping there is someone still here to hear. It is my first time making this recipe, and I am new to bread baking. I always want to do whole wheat, but my attempt at mixed wheat hamburger buns was not very good. My Grandmother buns (2 loaf recipe with 1 cup whole wheat flour) aren’t baked yet but I can tell there is something better about them. So fluffy and well risen! Since I used olive oil, at least there is that healthy aspect.
My question is this: I used the bun recipe with oil and egg. At 7 cups flour my dough was almost like a batter, and I probably added 2 more cups because it was so sticky. I am not in a humid area. Probably 40% tops. Is that bad? I kept worrying that I was toughening it or something…is sticky ok? It says to make it “elastic” and that wasn’t happening….
Also, on Suzanne’s post “A 9 yr old could do it” it looks like Morgan is kneading it in the bowl. Is that something y’all do?? I kinda tried it, but with my sticky dough i ended up turning it out, and i noticed those words are not in Suzanne’s recipes. Do I have to “turn it out onto a well floured board”. I’d love to save a dish to wash!
Thanks!
On June 22, 2013 at 11:00 pm
Audrey says:
Hey Paula, I haven’t tried the bun recipe yet, but I plan to soon, so I can’t help with that. As for adding more flour, sometimes you have to. The amount of flour needed depends on what the dough is telling you to add…if it’s too sticky, you definitely gotta add a little more flour. As for kneading in the bowl, I usually work in the bowl until it isn’t really sticky, and then turn it onto the floured board. Usually the last 1/2 cup’s worth of flour. It’s easier to knead that way, but there are no real rules here. You do what you’re comfy with. 😉
On June 29, 2013 at 1:22 pm
PaulaA says:
Thanks Audrey! The buns were wonderful! I Made half the dough into long buns, and half into hamburger, sprinkled the tops with poppy seeds and some of the mixed herbs from the cheese making kit this site inspired me to get. I had snuck one cup of whole wheat flour into them, too.my hot dog buns turned kind of flattened, so I have to figure that out…could I still have not used enough flour?? Nevertheless, we loved them. As soon as it cools off, I am going to try the original recipe without the egg and see what that’s likemformloaf bread. Thanks again for your reply.
On June 29, 2013 at 9:01 pm