

Yesterday was a cold, windy and wet day, so I stayed inside and worked in the kitchen. One of the things that I did yesterday was start a gallon of banana wine!
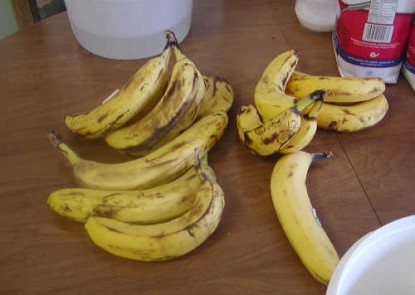
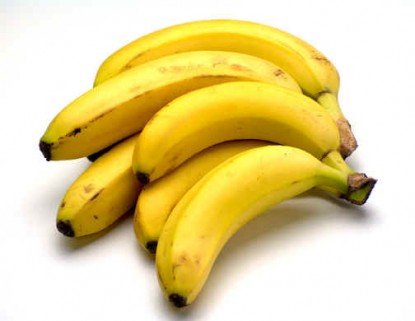
I bought a lot of bananas marked down at the grocery store. I was thrilled to find them, as ripe bananas are hard to locate these days in the store. Bananas at the store are always so green and I didn’t want to use green bananas for wine. I bought two bags of them–all that they had! Bananas, peeled and sliced, will freeze well for baking so I buy any marked down bananas that I find. We love banana muffins!
I used them all to make a gallon of wine. I know there are many banana wine recipes out there, but I made it like I make them all, with my own basic tried and true recipe. I think I will stick to that, now that I know it works well and just use it for everything. Some things will need more or less sugar, depending on how much they contain within themselves, but that will be the only thing that changes.
I start by sterilizing everything. E V E R Y . L I T T L E . T H I N G!
All buckets, cups, spoons, tubing, strainers, pots, measuring spoons, every single little thing has to be sterile. This is a lot easier than it sounds. I keep a bucket of sulphite made up and just dip all the stuff into it and rinse the larger things with it. This sterilizes them. They then have to be well rinsed to make sure there is no sulphite going into the wine at this stage or it will kill the yeast.
I make sulphite free organic wine, but do use it for sterilizing. It doesn’t go into the wine.
I am only making one gallon of banana wine so a one gallon plastic ice cream bucket makes a perfect primary fermentor.
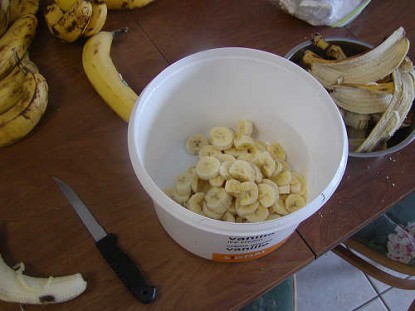
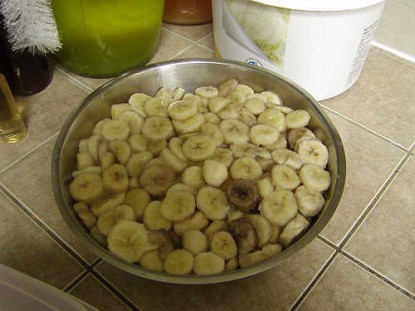
I use the one gallon bucket to measure the amount of fruit. I like to have at least 3/4 of a bucket full of chopped fruit. I had exactly that after all the bananas were all chopped! Perfect!
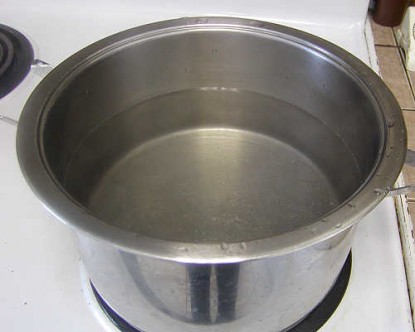
Because I am not using sulphite, I boil the water and add the chopped base to it. I then bring it back to a boil, remove from heat and allow to sit overnight, stirring occasionally. This will kill any wild yeast in it and extract most of the good juices and flavour. Sometimes I mash the fruit before adding it to the pot or even run it through the juicer or grind in the food processor. That usually depends on how dry it is.
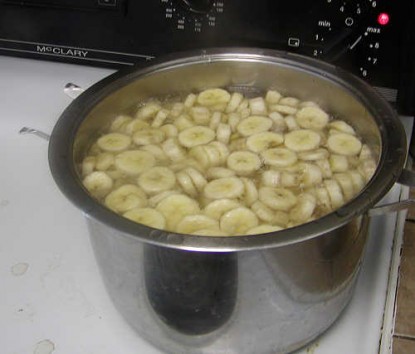
I don’t use an exact amount of water. I usually fill the sterilized bucket about 3/4 full of water, then put that into the pot to boil. I have to leave room for all that sugar and I will top up the jug after the must goes into it anyway, so being a little short of water is ok at this point. I would rather add water later than have to pour out some of that good must to make room for the sugar.
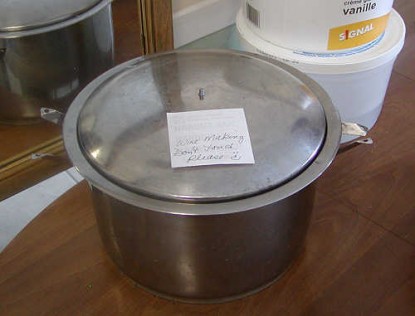
I sit the pot out of the way overnight and stir with a STERILE spoon occasionally. I always put a note on the pot so others know not to mess with it, although I think they know better anyway 🙂
The next day, which was this morning, I strained the water from the pot with a STERILE strainer – or I meant to. I accidentally strained one strainer full before realizing that I had not sterilized it! Oh no! I sterilized it and continued, hoping it will work out anyway. It will probably be ok as the strainer was clean and in a drawer where other yeasts would not be likely to find it. I have not been using any baker’s yeast or live vinegar in the kitchen in weeks. Here’s hoping it’s ok! Time will tell…
It’s not like I bought a kit for $50+. My homemade wines only cost pennies a glass to make so if it doesn’t work out, I’m just dissappointed and not out any actual cash.
That’ll teach me to make wine first thing in the morning, before breakfast and coffee!!
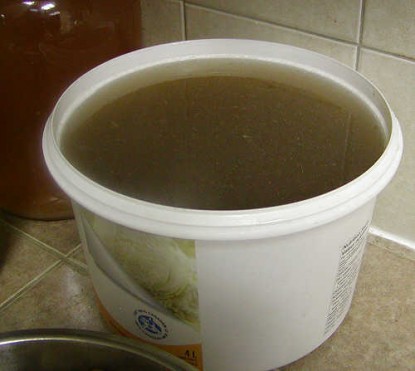
After the banana pieces have been strained and the liquid put into the sterile bucket (It’s thick with lots of body and banana goodness!) it’s time to add the yeast and other friendly, organic additives. I sterilized a glass measuring cup, inside and out, rinsed it well, then dipped about a cup of banana wine must from the bucket to warm up. Into the micorwave it went, but only for 20 secs, just enough time to warm it to room temp. I sprinkled about 1/4 of the yeast packet in this warmed water and set it aside to “proof” the yeast. (The yeast packet is enough to make 5 gallons.) Starting it in warm water gets it going quickly. My house is COLD most of the time, especially at night, so the must was cold after sitting all night in the kitchen.
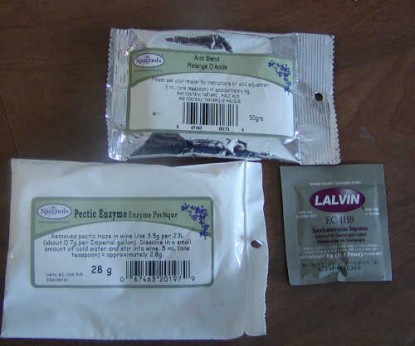
I also sterilized a small glass, inside and out, rinsed it well and added hot tap water (from our well) to it. Into this I put 1 teaspoon of pectic enzyme and 2 teaspoons of acid blend. This is commercial acid blend that I use. It’s a blend of malic, citrus and tartaric acids, purely organic and natural. It’s much easier to use and a more specific measurment than using lemons or oranges and doesn’t impart any of the citrus fruit flavour.
Through experimentation I know that I like this amount of acid in the wine, so this is what I add every time. If I decide to make a grapefruit or orange wine, I probably won’t add any acid to it. I will have to research that one.
The pectic enzyme is an organic natural enzyme that will eat up the pectin in the juice. Wine will not finish well with pectin in it. Not all bases contain pectin but you never know and I sometimes like to add white grape juice to wine to give it some body, if I think it will need it. I add this to most flower petal wines, usually about 1 tablespoon of white grape juice concentrate. I added pectic enzyme, of course, to the apple wine last week. Apples contain a lot of their own pectin and I added it to the banana today. Really, I add it to all wines, just to be sure. It’s completely tasteless, harmless, organic and cheap. It’s just a safety precaution that doesn’t cost me anything and makes for a good finished wine. There is no guarantee, of course. I added it to the dandelion wine and still had to clear it at the end.
When these were added to the bucket and stirred I added the yeast and stirred it again. After stirring well, I then added 2 pounds, or 4 cups, of sugar. I do have a hydrometer and I use it at this point, most of the time, but the wines I make with 4 cups of sugar usually have a reasonable alcohol level, around 12%. I added an extra cup to the lilac wine and it has a higher alcohol level, so I know there is some room to move. If I were using a fruit with a lot of it’s own sugar, I would use the hydrometer and add the sugar a cup at a time, continually testing it, just to make sure there would not be any sugar left in the must when the yeast had used all it could take in. I want dry wines.
When I had everything in the bucket and it was well stirred, I set the lid on it gently, not closing completely, and set it out of the way to work for a day or so. Ordinarily the yeast is working so hard for the first day that too much carbon dioxide it produced to put it into the secondary fermentor (glass jug) with an air lock. It will pop the air lock out. I will rack it into the secondary tomorrow afternoon, probably.
This is what is left after making the wine. I never know what to do with the leftover fruit. A lot of the goodness has been leached out of it but it seems a shame to compost it. I will be glad when we go back to chicken keeping this fall, then left overs won’t be a problem!
My goal is to have a large wine cellar, stocked with a few bottles of every kind of wine possible to make in this area! I doubt that I will get that far, but just having wine to drink that doesn’t give me headaches or Hubby a rash is great!
Editors Note: Sheryl has a free e-book on “Making Your Own Wine At Home” on her Farm Store site.
Sheryl – Runningtrails blogs at Providence Acres Farm Blog.
Do you have a recipe post or kitchen-related story to share on the Farm Bell blog?
Go here to read information and submit a post to the Farm Bell blog.
Want to subscribe to the Farm Bell blog? Go here.


lisabetholson says:
Sheryl, I read your last 2 posts about making wine and like what I have read as I want to make some Cherry Plum wine in August when they are ripe and probably Blackberry. I am very thankful for your instructions and plain cautions as I don’t want to come up with BAD or too much alcohol. Thank you, this looks great.
On March 22, 2011 at 9:01 am
Aimee says:
I am so excited for this! My husband has decided he wants to dabble in beer making this summer I was afraid I was going to be drowning in beer by Oktoberfest! Now I am going to try a hand at wine and hopefully have an alternative drink 🙂
On March 22, 2011 at 10:40 am
Sheryl - Runningtrails says:
I have wrtten a free ebook entitled “Making Organic Wine At Home”. You can download it free from my site here:
http://www.providenceacresfarm.com/farmstore_freebies.htm
It has instructions from beginning to end.
Wine making is a lot of fun, rewarding and inexpensive!
On March 22, 2011 at 5:35 pm
Aimee says:
Wow I downloaded your ebook, it is amazing thanks for all the information!! It is very easy to read and understand too, thanks for the work you put into it!
On March 27, 2011 at 11:33 am
Sheryl - Runningtrails says:
Thank you, Aimee! I’m glad it’s helpful!
On March 27, 2011 at 12:30 pm
Larissa says:
OMG! I am off to find another 50 pound box of bananas!!
On March 27, 2011 at 1:52 pm
jinjelle says:
Hello;
I went to the link you listed above to DL your e-book
“I have written a free e-book entitled “Making Organic Wine At Home”. You can download it free from my site here:
http://www.providenceacresfarm.com/farmstore_freebies.htm ”
AND
I could not find anything even remotely related to this. Do you have a direct link to this? Thank you.
On September 15, 2014 at 3:38 pm