


Hands-down my favorite sweet pickle. It only takes a little bit of time for ten days to turn out this crunchy, sweet little bite of pickle heaven. I put a big sticky-note on my fridge each morning to remind me what day I’m on and I usually double the recipe to get a canner load of quarts. This recipe is adapted from “The Complete Book of Pickling” J. MacKenzie
Difficulty: Intermediate
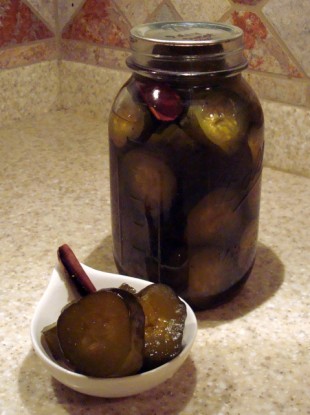
Servings: about 7 pint jars
Cook Time: Boiling water bath 10 minutes at sea level.Ingredients
Day 1 brine:
2 cups pickling or canning salt
12 cups filtered water
6 lb pickling 1 1/2″ to 2″ diameter pickling cukes, cut crosswise in 3/4″ chunks, blossom end removed
Day 7 brine:
8 cups filtered water
2 2/3 cups white vinegar
4 sticks of cinnamon, broken in half
8 cups granulated sugar
2 Tb celery seed
1 Tb whole allspice
6 cups apple cider vinegar
Directions
Day 1
1. In a pot combine salt and 12 cups filtered water. Bring to a boil over medium-high heat until salt is dissolved. Let cool to room temperature.
2. While the brine is cooling, scrub the cukes, remove 1/8″ slice of both ends and cut into 3/4″ slices. Weigh out 6 lbs of slices and put in a non-reactive bowl, crock or food-safe bucket.
3. Pour cooled Day 1 brine over the cukes, place a plate over the top. Fill a gallon baggie with water, zip it securely shut and weigh down the plate and cukes. You want the cucumbers to be submerged in the brine. Cover and let stand at cool room temperature for Day 2 and Day 3.
Day 4
1. Drain the cucumbers and rinse the bucket and plate. Return the cukes to the bucket and add fresh, cold filtered water to cover the cukes by at least 1 inch. Place the plate back on top and weigh down with the gallon baggie. Let stand at cool room temperature for one day.
Day 5
repeat Day 4
Day 6
repeat Day 4
Day 7
1. Drain the cucumbers. Rinse the bucket and plate well. In a really large pot, combine 8 cups filtered water and the white vinegar. Bring to a boil over medium high heat. Add the cukes and return to a boil, gently stirring occasionally. Reduce the heat to medium low and simmer for 1 to 1 1/2 hours or until the cucumbers are translucent. Drain well, in batches as necessary, and place the cukes back in the clean bucket. Set aside.
2. In a clean pot, combine the cinnamon sticks, sugar, celery seed, allspice and cider vinegar. Bring to a boil over medium heat, stirring often until the sugar is dissolved. Boil for 5 minutes. Pour over the cucumbers and let cool. Place the plate on top and weigh down with the water-filled gallon baggie. Cover and let stand at cool room temperature for 1 day.
Day 8
Set a colander over a large pot. Drain the liquid from the cucumbers (working in batches if necessary) Save the liquid! Rinse the plate and the bucket. Return the cucumbers and cinnamon sticks to the bucket. Bring the reserved liquid to a boil on high heat. Pour over the cucumbers and let cool. Put the plate back on top of the cukes, weigh it down with the gallon baggie of water and let stand at cool room temperature for one day.
Day 9
repeat Day 8
Day 10
1. Prepare canner, jars and lids.
2. Transfer the cukes and liquid to a large pot. Bring to a boil over medium high heat.
3. Pack the cucumbers and one half cinnamon stick from the brine into your hot jar, leaving 1″ headspace. Pour in hot pickling liquid, leaving 1/2″ headspace. Remove air bubbles and adjust headspace as necessary by adding hot pickling liquid. Optionally, add 1/2 teaspoon per quart or 1/4 teaspoon per pint of Pickle Crisp (calcium chloride) to the jar after filling. Wipe rim of the jar and cap.
4. Place jars in the BWB and process for 10 minutes (adjust your processing time for your altitude) Turn off the heat, let the jars sit in the bath for 5 minutes then remove to a towel-covered surface and let stand overnight. Check lids for a good seal. Refrigerate any jars that didn’t seal. I recommend letting the pickles cure at least 2 weeks before eating them so they get full flavor.
Categories: Boiling Water Bath, BWB Pickles & Pickled Stuff, Canning, Pickling, Preserving
Submitted by: absinthe on May 1, 2011


Jeanne says:
Teaspoons! Darnit. 1/4 TSP per pint or 1/2 TSP of calcium chloride per quart. That much Pickle Crisp wouldn’t hurt you, but might leave a funny aftertaste.
On May 1, 2011 at 9:21 pm
Suzanne McMinn says:
Jeanne, I fixed it. I think! Let me know if that looks right now?
On May 1, 2011 at 9:50 pm
Jeanne says:
Yes, thank you very much! I had tablespoons on the brain for some reason.
On May 1, 2011 at 11:15 pm
IRCHEF says:
I have a question on when to add the white vinegar?
Day 7 step 2 says to add the cider vinegar but doesn’t say anything about the white vinegar. I was wondering when do you add it, none of the other steps say when to add white vinegar either. Am I missing something?
On June 10, 2014 at 3:53 pm
IRCHEF says:
My Bad, I re-read the recipe and I see where you add the White vinegar.
Thank You
On June 11, 2014 at 8:43 am
foreverGinger says:
Hi everyone. I’m new to the site. I have already started making these pickles and I need to know how long to leave the pickles in the brine. So far, they have been in the brine for 24 hours. Do I leave them in the brine for 3 full days? Thanks for your help. Looking forward to all the great recipes.
On August 24, 2014 at 4:08 pm