You should be able to find all of the basic equipment and supplies mentioned here–pouring pot, wax, dyes, scents, wicks, etc.–at any large craft store.
For more about making container candles, see How to Make Container Candles.
Creating a Work Area
First of all, be sure to protect your work space. If you’re making candles in your kitchen, cover your countertops to prevent staining from dyes if you spill while you’re pouring the prepared wax. You can use newspaper, aluminum foil, or wax paper. You need access to a heat source to melt your wax as well as a work counter, so the kitchen is an obvious location. If you have a space in your home you can dedicate for candlemaking, you’ll need a table and a portable burner.
Finding a Pouring Pot
The basic equipment to make container candles can be very basic and doesn’t involve a huge expenditure of money. I don’t want to melt wax in a container that is pricey and/or that I would want to use also for food purposes. It just makes cleanup less of a hassle if I’m not worried about using the melting pot for food. I found this pot at Michael’s. I like the handy pouring spout.
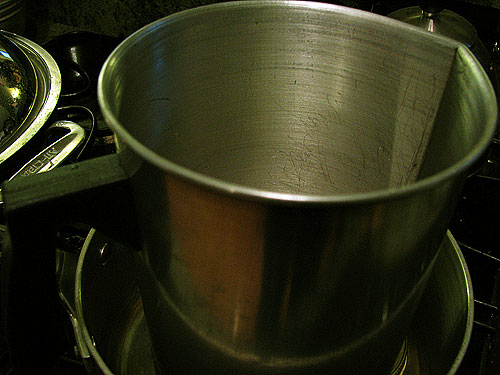
I don’t intend to use this pot for food and I find once I’ve used all the wax, it wipes out easily with a paper towel to remove the residual wax. (Wipe it out while the pot is still warm.) You could make do with any other suitable container as a melting pot, but your best bet would be to use something you can dedicate to candlemaking, that is stainless steel, and preferably something with a pouring spout. (An old coffee pot from a thriftstore, for example, would be great!)
Making a Double Boiler
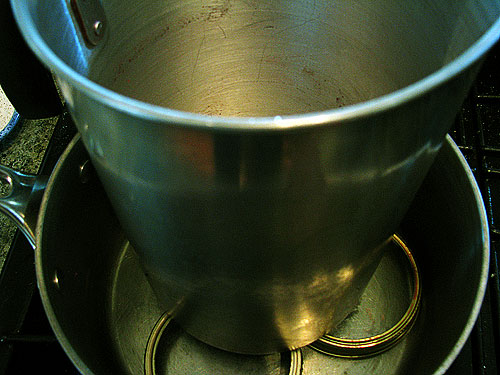
You need a double boiler as you shouldn’t melt wax in a pot on direct heat. (This can cause fire! Don’t do it! To be extra cautious, keep some baking soda onhand while you’re melting wax–baking soda acts as a fire extinguisher. Don’t try to use water to put out a wax fire!) I don’t have a double boiler, nor did I want to invest in one for candlemaking purposes. To create a double boiler facsimile, I use a medium-size stainless steel pot for the base. I place three canning rings inside the pot as a makeshift trivet or rack.
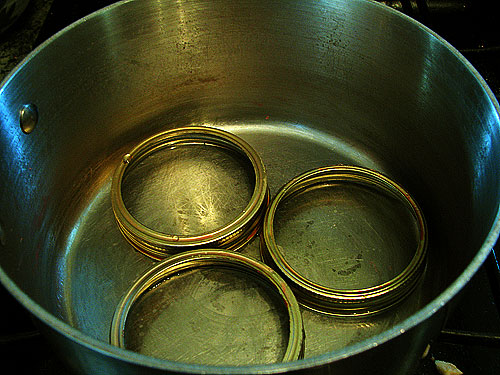
You can use anything similar that you have available to you to do the same thing. The point is to keep the pouring pot in which you’re melting the wax set up off the direct heat. To melt the wax, I just pour water into the base pot and set the pouring pot on top of the canning rings.
Buying Wax
There are many different types of wax. Paraffin wax comes in beads or slabs, and you can even buy specially prepared container wax, which is actually a wax blend. It’s formulated to hold more fragrance and yield less shrinkage. Some container waxes are formulated for “single-pour” use, which means no topping off is required. (This type of wax blend is more expensive. Topping off isn’t that big of a deal. What is topping off? As the wax sets, a well or depression forms around the wick. You’ll need to top off a few times to “fill the well” so remember not to pour your container too high at first as you will be adding more wax as you top off.) “Household” wax, often sold in grocery stores, is a very soft, low MP (melting point) paraffin.
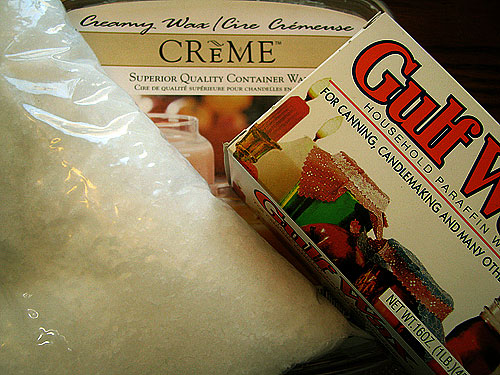
You can use low MP paraffin for container candles, but you may want to add stearic acid, which is a hardening agent that raises the wax melting point. (Stearic acid is hard to find in craft stores, but you can order it online.) You can make container candles out of “household” wax without adding stearic acid–just expect your candle to burn more quickly. Higher MP paraffin, which sets up harder, is ideal for molded candles or tapers, etc. To get started making container candles, the simplest thing to do is pick up a couple pounds of container wax from a craft store. You can also find soy and gel candlemaking supplies at most craft stores. There are tons of online sources for bulk wax if you really get into it. (Bulk is cheaper for everything–wax, wicks, scents, dyes, etc.)
Recycling Wax
Another easy way to get started making candles is to use wax that’s free or nearly free by recycling your own old candles. You can also snap up the cheap sets of candles at stores like Dollar General or Wal-Mart.
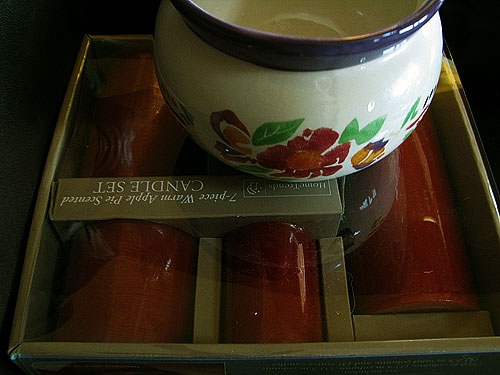
This set of pillar candles came from my cousin, who is sensitive to scented candles so passed them on to me to melt down. I’ll transform them into container candles. Keep an eye out for cheap candle sets when you’re out shopping. Sometimes you find those for just a few bucks and can melt them down into your own containers for less than buying the plain wax–and the wax comes with the dye already in it! (Cheap candles tend to not be well-scented, so you’ll still have to add your own scent.)
See Recycling Candles.
Thermometer
You can buy designated candlemaking thermometers, but may find you have something in your kitchen already that will do. I’ve been using a candy thermometer. (Just wipe it off while the wax is still warm and it cleans up easily.) It’s important not to overheat wax. (This could cause a fire!) If you buy small boxes of wax at a craft store, temperature guidelines should be included in the packaging. Always follow package directions. Most “household” waxes have a melting point of 130 degrees. Research melting points for various types of waxes when you’re recycling wax. For example, a common melting point for pillar and votive wax blends is 145 degrees. (You can find out more about wax melting points and other information by buying a candlemaking book. Search on “candlemaking” on Amazon or pick up a candlemaking guide at your local bookstore or craft store. Search on “candle wax melting points” in a search engine and you can also find information online.)
Note: When you’re recycling wax, if you’re not sure what type of wax it is, melt it at the lowest temperature it is pourable for safety’s sake. Also–never leave melting wax unattended.
Wicking
You can buy pre-waxed wire wick and tab assemblies that making wicking container candles easy. Check the packaging–it’s important to use the right size wick for the width of the jars you intend to use. Also, check to make sure the wick brand is lead-free–the packaging should specify. You can buy wick assemblies in various heights. Use “Tacky Wax” to affix the wick tab to the bottom of your jar to keep it from moving around when you pour the wax.
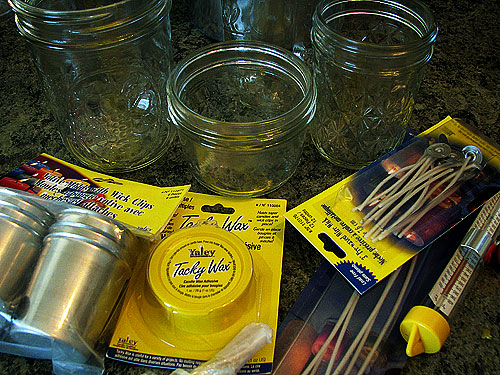
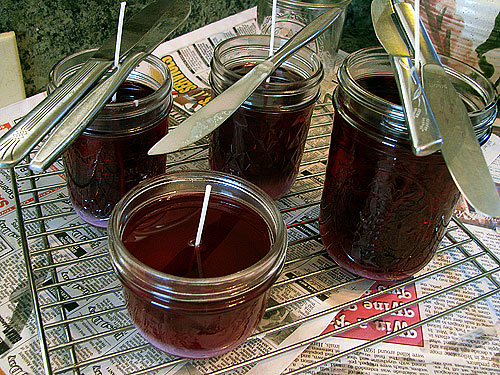
You’ll also want some kind of implement to support the wick before the wax sets up. I use butter knives positioned to keep the wicks in place.
Repurposing Jars
Jars can be anything! Canning jars are great as they are intended to withstand heat. Recycled jars from old candles are free. All sorts of different items can be turned into a container for a candle. Your container needs to be able to withstand heat and flame and also be stable for safety.
Dyes
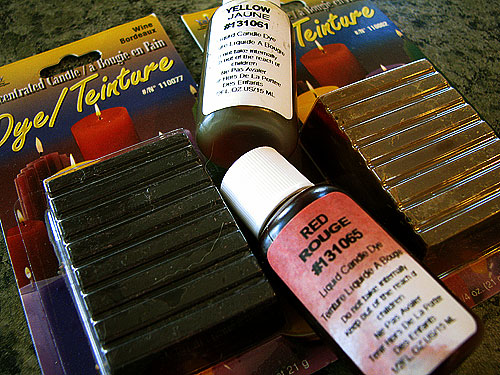
You can buy dye in solids or liquids. Get a dropper, both for dyes and scents, to make dispensing easy. You can also use measuring spoons. You can even use crayons for the dye, but dyes specifically prepared for candlemaking work best.
Scents
Scents made for candlemaking purposes hold their scent best over time, but you can use any oil-based fragrance, such as natural/essential oils, perfumes, aromatherapy or potpourri oils. Remember to add scent at the very last minute before pouring or you’ll cook your scent out.
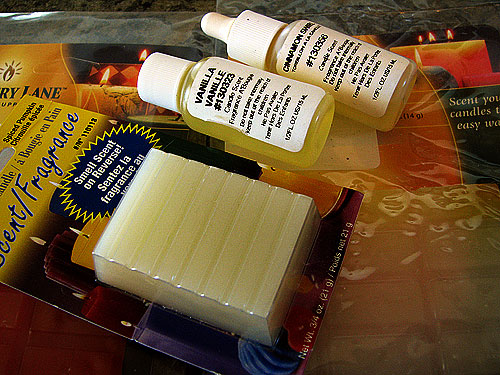
Experiment with dyes and scents! Start out with a few small packages of inexpensive dye and scent formulated for candlemaking and follow the label directions for amounts per pound of wax. Once you get a feel for it, start playing. A good idea is to keep notes on how much dye and scent (and the combinations) you use as you’re experimenting, then you can recreate what you end up liking best.
Wax Clean-up
As I mentioned, I’ve found it easy to wipe out my melting pot while the wax is still warm. If you forget to do that, you can either briefly reheat the pot to wipe it out or, as some of you have suggested, stick it in the freezer. When the wax is frozen, it will pop right off. The freezer trick also works for aiding in getting leftover wax out of jars for recycling.
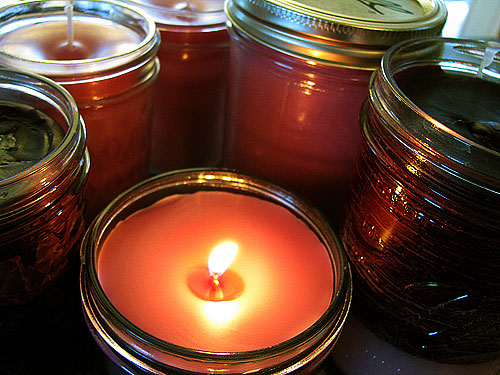
See how cheap and easy this is? Now you can be as crazy about candles as I am!
Also see Fun with Container Candles.


SuzieQ says:
Back to the craft store!! I haven’t made candles in a long time and now you’ve given me the bug! I sometimes consolidate leftover bits of jar candles using a candle warmer (you don’t have to keep watch over it)…just leave on till the residue melts, place a wick in jar and remove to cool and melt the next one and pour into first jar..just continue till you have a layered jar candle..You can use up all those that never burned completely up..Mix and match colors and scents.. :woof:
On February 10, 2009 at 1:41 am
Gabrielle says:
Thanks so much! I’m a scented candle freak (like you, I opt toward the food-scented ones…hmmm!) and used to make them as a kid. You’ve just reminded me what fun this is–and how we can save money and resources. You (once again!) rock.
On February 10, 2009 at 3:50 am
Heidi says:
Girl – you make my life so much fun!!!
On February 10, 2009 at 5:39 am
mim says:
Not sure if this place is still in St Albans, WV but Southern Candles had bulk candle supplies. They are also located in Kanawha City but I don’t know if this location has bulk items.
:chicken:
On February 10, 2009 at 6:28 am
Ginny Manor says:
The cheapest–free–pouring pot is a #10 size can. It can be ‘creased’ to form a pouring lip, and will fit inside a stewpot or dutch oven just fine. It’s an old Girl Scout trick!
On February 10, 2009 at 8:07 am
Kacey says:
I usually buy candle supplies at Michael’s when I have a coupon. I don’t use the tacky wax either. I just put a drop of the wax in the bottom and press the end of the wick into it.
Have you ever had problems with the candles staining the containers you’ve used? I was thinking about making one in a milk glass bowl, but I was worried about the wax staining the white of the milk glass.
On February 10, 2009 at 8:24 am
Stephanie...was in KY, now in IN! says:
The wax will stain a milk glass bowl if there are even the slightest cracks in the finish. Sometimes you can’t even see them, but the color will seep into them. So I wouldn’t recommend using it for candles if it has any value.
On February 10, 2009 at 11:17 am
Nancy in Atlanta says:
Boy, this takes me wayyyy back to my own candle-making days! I experimented with ice – filled a quart-sized milk container (nicely waxed inside) with crushed ice and poured the melted wax inside. Later I peeled the cardboard and had a square candle with lacy “holes”. Remember, though, that my memory is 40 years old!!
On February 10, 2009 at 9:34 am
Lisa says:
One of the 4-H projects my mom had us do when we were kids was make candles. We use a coffee can to melt the wax. For coloring, we’d add a broken crayon, stirring well to get the color smoothed out. We also used the paper milk cartons as forms for candles. In the cartons we put the wick and then put in ice cubes before pouring the wax over. Once the candle had set, peel away the carton and look at the lovely shapes the melted ice cubes left.
On February 10, 2009 at 9:40 am
Laura says:
Thank goodness you put the warning that wax + water = bad thing. At 4-H camp, the adult in charge of the candlemaking event had an accident, where the coffee can full of wax fell off whatever it was sitting on and dumped into the water. I’ve never seen a flame go so high over so little. Luckily, everyone was ok and since we were outside, no harm, no foul. It just made everyone more aware of the wax and water issue.
I also love to make candles in jam jars and give them away at Christmas. I can make them throughout the year and just stock them up until December. It is a good way to break up your holiday spending into more manageable bits.
On February 10, 2009 at 10:00 am
CindyP says:
Wow, Suzanne!! 3 days worth of posts with candles! Excellent posts, by the way! A person should not be left out of the candlemaking experience… it’s such an easy, inexpensive (I guess it could get very expensive if a person tried) craft to do.
On February 10, 2009 at 10:13 am
trish says:
I am one of the few I’m sure who will be glad when you get back to posts about clover! lol I have learned alot though.
Bad enough you have me baking again. Just made your chocolate mint cookies. yum! but I am not going to make candles! lol lol
On February 10, 2009 at 10:47 am
Sandhill Sis says:
Great post. I’ve always wanted to do this, but haven’t looked into it. Thanks.
On February 10, 2009 at 10:47 am
Amber says:
Thank you for the informative post! I had noticed in most of the pictures of your kitchen from previous recipe posts that you always have a container candle burning by your sink. I always do too! But in these lean times it was getting harder to fork out ten to twenty bucks for a good smelling candle. So thank you, thank you, your timing couldn’t be better!
On February 10, 2009 at 12:05 pm
Suzanne McMinn says:
That’s what motivated me, Amber! I love candles but I can’t afford to buy them anymore. Now I can still have candles!
On February 10, 2009 at 12:09 pm
ML says:
I’m making candles today, red Apple Cinnamon ones. I bought my supplies last night from the local craft store. The only thing is that I have to prime (wax) my wicks. They didn’t have the right prewaxed wicks that I need for my containers. I hope everything turns out good, this will be my first time!
On February 10, 2009 at 12:09 pm
marleyde says:
I have it figured out. While you’re blogging about candles in detail, taking and sharing wonderful photographs, cooking and photographing the recipes, running your farm, and taking care of your kids, your assistant|husband|ornery angel is attached to your hip, recording your novels and then transcribing them!
That’s the only way you have time to treat us everyday to this act of love and get your books written, submitted, revised and published, much less do promotion.
Thank you, thank you, thank you. :heart:
On February 10, 2009 at 3:05 pm
DeeBee says:
I want to try and make these candles. How fun!!
On February 10, 2009 at 9:01 pm
Jen R. says:
Hi Suzanne-
Your candles look fun. I live in Oregon and buy my supplies for candle and soap making at GloryBee Food and Crafts. You can order online from them as well. https://www.glorybeefoods.com/gbf/Shop_List.cfm?PC=4&PSC=&Token=71.236.252.62:{ts_2009-02-11_12:02:32}-841305
On February 11, 2009 at 2:05 pm
Dessa says:
Okay, I have to try this. I’ve never tried making candles before but your instructions are so clear I think I am brave enough to give it a try.
On February 11, 2009 at 3:17 pm
Organizing Mommy says:
thanks!!!
On February 18, 2009 at 5:43 pm
Quality Makes Scents says:
Great Work! I’m astounded at the thoroughness of this article and look forward to other articles you have, and new ones!
In my line of business, Quality makes Sense AND Scents! Thanks for showing everyone that you can enjoy your own quality products!
Handmade always seems the best anyway, especially when you know every ingredient in it!
On February 19, 2009 at 2:20 pm
Yewande says:
Hello loved this lesson on candle making and supplies.
I understand that the wicks are usually made with lead. Do you know if anyone sells sets of wicks that are lead free?
On December 19, 2009 at 9:43 am
lesliedgray says:
I made some candles a while back… before reading this post…. i did almost everything the same as you instructed..EXCEPT, i put in the scent too early (and maybe the wax was too hot) .. Now I have a beautiful beeswax candle in a beautiful little jar…… with no scent..LOL!
On October 31, 2012 at 4:05 pm