How to Pasteurize Milk

Apr
22

Start with a cow.

Tie her up, tie her down, tie her sideways. (Shades of Clover.) Okay, a cow is not quite as much trouble to milk as a goat, but cows are quite strong. Get ‘er milked and take your booty home. I have a post specifically about handling milk here: Handling Milk. I’ll brush by some of that information here, but read that post for more details. I’ve had a number of questions about pasteurizing milk, so this post is going to focus on that process.

I bring my milk home in quart jars transferred from my milking bucket after I finish milking Beulah Petunia down in the meadow bottom. (We’re hoping to have her moved closer to the house soon.)

I open all the jars and get ready to filter and measure the milk.

You can buy milk filters made specifically for this purpose at feed or farm supply stores. No doubt back in the day, they used a couple layers of cheesecloth. Or an old shirt. (I’M JUST KIDDING. Maybe.)

This is what the filters look like.

I use a strainer and a two-quart bowl so I’m measuring as I’m filtering. (You don’t have to measure, of course. I just like to keep track.)

Place a filter in the strainer.

Pour the milk through the filtered strainer into the bowl.

Pour the fresh, clean milk into a big pot.

Stick a thermometer in there.

Put the lid on, as you can around the thermometer.

Turn the heat on medium to medium-low. You can pasteurize by different temperatures. You can pasteurize at 145-degrees and hold the milk at that temperature for 30 minutes. Or you can pasteurize at 165-degrees and hold the milk at that temperature for just 15 seconds.

Pasteurization itself is a hot topic. For many people, there is no milk like raw milk. It can be anything from a taste and nutritional decision to a philosophical and nigh on political position. For others, safety is a weighty concern.

Here are a few of the facts.

Pasteurization was developed as a public health measure to save lives. Heating milk to pasteurize destroys pathogenic bacteria. On the other hand, heating milk to pasteurize also makes proteins, vitamins, and milk sugars less available and destroys enzymes. Pasteurization changes the flavor of milk and denatures the whey proteins, resulting in a weaker curd for cheesemaking. (This is why bacterial starters are commonly used in making cheese.) Ultra-pasteurization involves heating the milk to 191-degrees and is a growing practice that allows a longer shelf life. (Avoid buying ultra-pasteurized milk or cream for any of your cheesemaking endeavors.)

The decision to pasteurize or not pasteurize is a personal one, and I’m barely touching the surface here. Only you can decide what is right for you and your family. Consult expert sources for more information. I didn’t pasteurize my goat milk when I was milking Clover. I knew Clover, knew her history, knew where she came from. I just met Beulah Petunia. I don’t know very much about her, her health history, or the people we got her from. At this time, I’m pasteurizing her milk.

While I’m pasteurizing, I attend to other tasks, such as filling the dishwasher from the mess I just made.

All the jars and bowls, the strainer, my milking pot and other things go straight in the dishwasher to get ready for tomorrow. I’ve got cheese ready to come out the press.

I take it out of the press and set it on a plate inside a cabinet to safely (away from cats!) air dry for a few days before being waxed and aged. It’s a stirred-curd white cheddar, a hard cheese, and will have to age for at least two months.

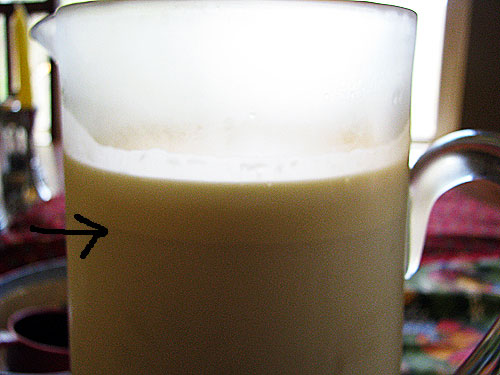
I take out bowls of milk from the fridge from yesterday’s milking and pasteurizing. Time to take the cream off.

I remove the heavy cream, then the light cream, transferring them to separate containers for later use. Then I pour the milk that remains into pitchers to store for drinking, baking, and cheesemaking.

I take out the milk from two days before and think about what I’m going to make with it.

By then, the milk is finished pasteurizing. I plug the sink then run cold water in it and add ice cubes.

Add the pot to the sink to cool the milk down fast.

Transfer to bowls after about 20 minutes and place the milk in the refrigerator to continue chilling.

Now go make some cheese or something and go on with your life.

That’s just another morning with Beulah Petunia!

Check out all my cheesemaking posts.

See All My Recipes
Print This Page Print This Page


Let’s Make Butter!

Apr
20


Butter is one of my very favorite things in the whole wide world, so I’ve been really looking forward to making my own homemade butter ever since I found out I was getting a cow. As soon as I had a quart of heavy cream stashed away, I did it! And it was so easy.

I thought it would be more difficult. I studied in advance. Prepared. Planned. Discussed it with Beulah Petunia.

She didn’t really have much to say about it, though she’s generally opposed to margarine as it is in conflict with her livelihood.

Making butter is the process of releasing butterfat from the cream. Like cheesemaking, it’s an age-old and delicious way of preserving milk. I set out to try two methods–one, shaking the cream up in a quart jar, and two, mixing it in a blender. I got the blender out and everything. But I never got that far. I tried the jar method first and it was so quick and so simple, the mere notion of having to clean up the blender after that method sounded like far too much trouble. No blender method for me.

I’m a quart jar girl all the way!

Here’s how you do it.

Take one pint of heavy cream. Heavy cream. Not too fresh. It’s best to work with cream that’s been sitting in the fridge for a couple of days.

Some of Beulah Petunia’s cream is so thick, you can spoon it up.

I’ve refined my cream-skimming and am doing much better now–thanks for all the tips! What I’ve found works for me is setting the fresh milk to chill in a large bowl after I’ve finished handling it when I bring it in. The next day, I use a large stainless steel spoon to carefully skim across the surface. I take the thick, heavy cream off and that goes into one jar, then I skim off the light cream underneath to another jar. I’m getting much more cream since I started skimming from a big bowl!

Back to butter– Set your heavy cream out for several hours to come to room temperature. When you’re ready to start, pour your pint of cream into a quart jar.

Cover tightly with a lid and start shaking! At first, the cream will seem to expand and fill up the jar to where it almost looks as if you can’t shake it anymore.

(I had 52 doing the shaking here.) Keep shaking–next thing you know, a big yellow blob of butter will appear inside the jar. It’s like magic!

How exciting is that?

This took THREE MINUTES. From cream to butter–in three minutes. (Now you know why I said, forget it, to the blender. The jar is very easy to wash and who needs to take apart a blender for no good reason.)

Using a spoon to hold the butter in place, pour off the buttermilk, transferring it to another jar.

I see buttermilk pancakes, buttermilk biscuits, buttermilk cornbread…..!!!!

After removing the buttermilk, dump the butter in a bowl. (The most straight-sided bowl you have is best.) Using the back of a big spoon, press the butter, pushing out any remaining liquid. This is still buttermilk, so add it to your buttermilk jar.

Run cold water over the butter then press again, releasing as much liquid as possible. Dump this liquid–from this point on, it’s watered down and you don’t want to save it. Repeat this process of washing the butter several times until the water is pressing out clear.

After you’ve washed it for the last time, add salt to taste. (Salt also helps preserve the butter.) Refrigerate and eat with much happiness because you made it yourself!

This was unbelievably easy. And delicious. One quart of heavy cream should yield around a pint of butter, more or less.

There are numerous variations on making butter. You can make it with a stand mixer, a blender, or a food processor, too. (Or even the old-fashioned way with a hand-cranked churn!) Read the pearls of experienced butter-making wisdom here in the Chickens in the Road forum topic devoted to the love of making butter, Making Butter at Home, for more tips and instructions about other methods of making butter. (I learned a lot there!)

I love the jar method. For me, this works in three minutes flat, so I lost all interest in trying out other methods. If you’ve tried the jar method in the past and it took forever (I’ve heard people talk about shaking the jar for 30 minutes and having to pass it around to multiple hands because it took so long), or if you get a low yield on your butter, double-check a few things:

*Be sure to use really good, rich heavy cream.
*Don’t use cream that’s too fresh. Let the cream for butter sit in the fridge a couple days before using.
*Don’t use ultra-pasteurized cream.
*Let the cream come to room temperature before starting to make butter.

If you must use ultra-pasteurized cream, add a packet of direct-set mesophilic starter per quart of cream. Let the cream set for 12 hours, at room temperature, after stirring in the starter before making butter. (Starters can be purchased from cheesemaking supply companies.)

Beulah Petunia, heading for the milking station with dairy supervisor, Jack, and trusty sidekick for all endeavors, Boomer.

Make some butter!

Or you might upset Beulah Petunia! (And we can’t have that.)

See All My Recipes
Print This Page Print This Page


April 17, 2010 - Cornbread Supper Skillet

This cornbread supper skillet is so easy and so fast, you’ll think you’re making Homemade Hamburger Helper. Only different. With cornbread! And it’s delicious. You can use this as a go-to dish for a quick dinner when you have no time at all, or bake it when you have lots of time and spend your...
Read More

April 14, 2010 - My First Cream

This is the cream line. My first cream came off the top of a half-gallon pitcher of milk. The rest of the milk from the first day’s milking went down children’s throats before there was time for me to separate it. I guarded this pitcher against invasion and eagerly waited for the next day to...
Read More

April 8, 2010 - Homemade Mayo, Mustard & Potato Salad

How did we go from winter to summer overnight? It’s been in the 80s here. The 80s! (The temps are supposed to drop off starting today, though. Hello, spring???) Cook-out weather makes me hungry for potato salad right away. Cold, creamy, cook-out-style potato salad with lots of celery and pickle relish. I can’t stand store-bought...
Read More